Setting Up Revs, by Chris Matheson
|
|
|
| Menu |
|
Home
About News Kites Kite Design Kite Making Contributed - Building Eng. - Building Ger. - Rev Setup - Broken Glass Skateboards To-do Links |
From the 'Chris Answers' column in Kite Passion Magazine. Reproduced with Chris's permission
I've been asked a lot of questions over the years about Rev's (thanks to my time spent as a Decorator). Now I have this column, the questions seem to have started again. I've decided the best way to deal with this is to start at the beginning. I've put together a few questions asked by beginners to Rev' flying, hopefully this will get people up in the air and started. I will be putting the next set up soon, but for now, this will get you going and start to put you in control.
What's the best way to attach my lines to my handles / Kite?
How can I adjust my lines for different wind conditions?
I find that my wrists get tired, how come?
When I'm trying to do really slow moves I have problems stopping the kite from driving forward. What can I do?
These questions all kind of link together, so I'll have a go at them together.
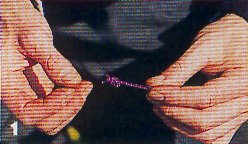
Start with 8 lengths of bridle quality line, about 1 foot / 30cm long. Seal each of the ends with a flame. Take four lengths, fold in half and tie an overhand knot in the end making four loops (pic. 1). Now set your kite up (best done indoors) and find the loops on the bridle for attaching your lines. Take one of the loops you made and push it through the loop of the bridle (about 50%). Pass the knotted end back through itself and pull tight (pic. 2).
That's the kite set, now let's move onto the handles.
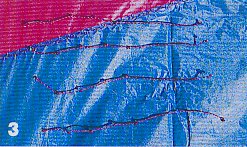
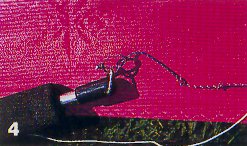
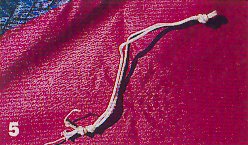
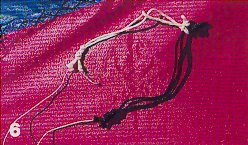
Take one of the four lengths left and tie an overhand knot every inch / 2.5cm. Starting right at one end, tie 5 knots and then one at the other end (pic. 3). Now, using the end with the large gap between the knots, push the line through the ring on your handles, come back round, over the line, under and up. Now close the loop that is made toward the knot on the end. This will pull the whole thing down to the handle and it will lock in (pic. 4). Now it's time to get rid of the clips from the lines. You will notice here that Revolution give you a good-sized sleeved area on your lines. (Work on one end / set of lines at a time. This will stop your sets getting mixed up, believe me you don't want to do that, I know). Tie an over hand knot in the end of each sleeved loop. This will give you something to get hold of when you remove your lines from your kite and something to attach the sets with when wrapping your lines (pic. 5).
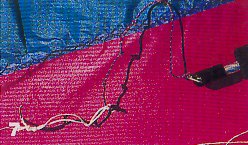
To attach your lines to your handles you now just use a lark's head knot. At this point lark's head onto the last knot on each handle (pics. 6 and 7).
The next bit needs to be done on the flying field with a good wind for your kite. (Not a day when you need to walk backwards to keep the kite flying.) The next bit will answer the last three questions in one, basically it's all in the set up.
What we are going to try and achieve next is getting your lines set in such a way that you are able to have a kind of neutral position when you are flying. This will help when it comes to the really, really slow moves you see people like the Decorators do. It will help not to overload your wrists as you're not always having to try and keep the kite still and it will help you to adjust your kites for different winds.
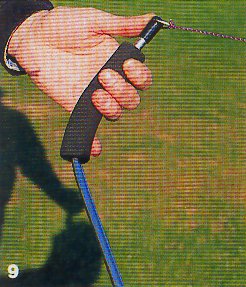
This is the position of my hands when 1 fly (pic. 8). As you can see I can balance the handles on my two middle fingers. This is my neutral position. When I have the kite like this it stays where it is and 1 can concentrate on the small movements that go into the slow-mo moves. With the rest of my hand in place 1 can do small control movements with my first and small fingers and the big breaking moves with my thumb (pic. 9). To adjust your lines so that you can find your balance point, just move the lark's head up and down the knots on your tracers. Moving the bottom set toward the handles will give you more brake, moving the top set will give you more forward movement. Play with the settings until you find the right one for you, remember your balance point maybe different to mine. Find what suits you.
One last thing. It's best to find your balance point with the leading edge pointing left or right. You will find that holding the kite with the leading edge up will require some kind of input from you most times, even after you have your balance point, but a lot less.


contributed/revsetup.html last modified 19:57:07 30-Jul-2017

This work is licensed under a Creative Commons Attribution-NonCommercial-ShareAlike 2.0 England & Wales License.